Option 2: Use a recent JDK
If you will be using a recent JDK (version 11 or higher) then you need to download JavaFX separately and install it as a custom User Library.
Download the latest version of JavaFX.
Unzip the downloaded file a folder where you'd like to store JavaFX permanently (probably not in your Downloads folder).
Here's how to create a User Library for JavaFX:
From the Eclipse menu, choose
Window → Preferences → Java → Build Path → User Libraries → New
Click the New button and give the library a name such as JavaFX.
Select the library in the list and click the Add External JARs button.
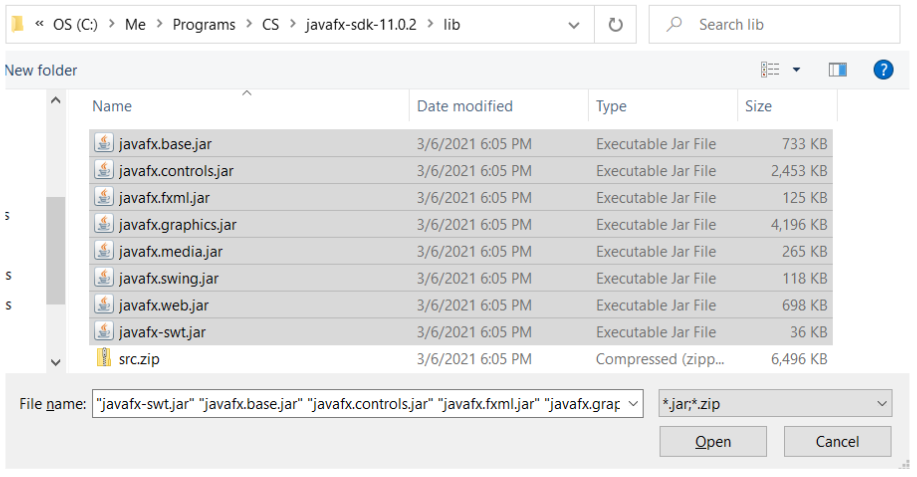
Navigate to where you unzipped JavaFX and then open the "lib" folder (which stands for "libraries")
Select all the JAR files in the javafx/lib folder.
See screen shot, below.
Click Apply and Close
Example of selecting all the JAR files in your JavaFX/lib folder:
Making a JavaFX project
Create a new Java Project as usual.
After you have created the project, right-click it and choose
Build Path → Add Libraries → User Library
Then select the JavaFX user library you created earlier
Add a Class to your project as you normally would and include a main method in this class.
Run your program. It doesn't do anything yet but running it will create a Run Configuration needed for the next step.
Right-click the project again and choose Run As → Run Configurations
Under "Java Application" you should see an entry for the class you just ran in step 4. Select it, then select the Arguments tab.
Under VM Arguments enter the following except replace the bold text with the path to your javafx/lib folder on your computer:
Windows
--module-path "\path\to\javafx-sdk-15.0.1\lib" --add-modules javafx.controls,javafx.fxml
Mac
--module-path /path/to/javafx-sdk-15.0.1/lib --add-modules javafx.controls,javafx.fxml
Click Apply, then Close
Making your project a Module (running without VM Arguments)
If you want to run your project without having to set up VM arguments, you can make your project a module and require the javafx modules in the module-info.java file. Here are the steps:
- Create a new Java Project as shown below. Note that the option to "create module-info.java" is checked. If you don't have that option, it means the JRE you chose is not at least version 11+. You can choose the default jre that comes with eclipse as long as your eclipse is a reasonably recent release.
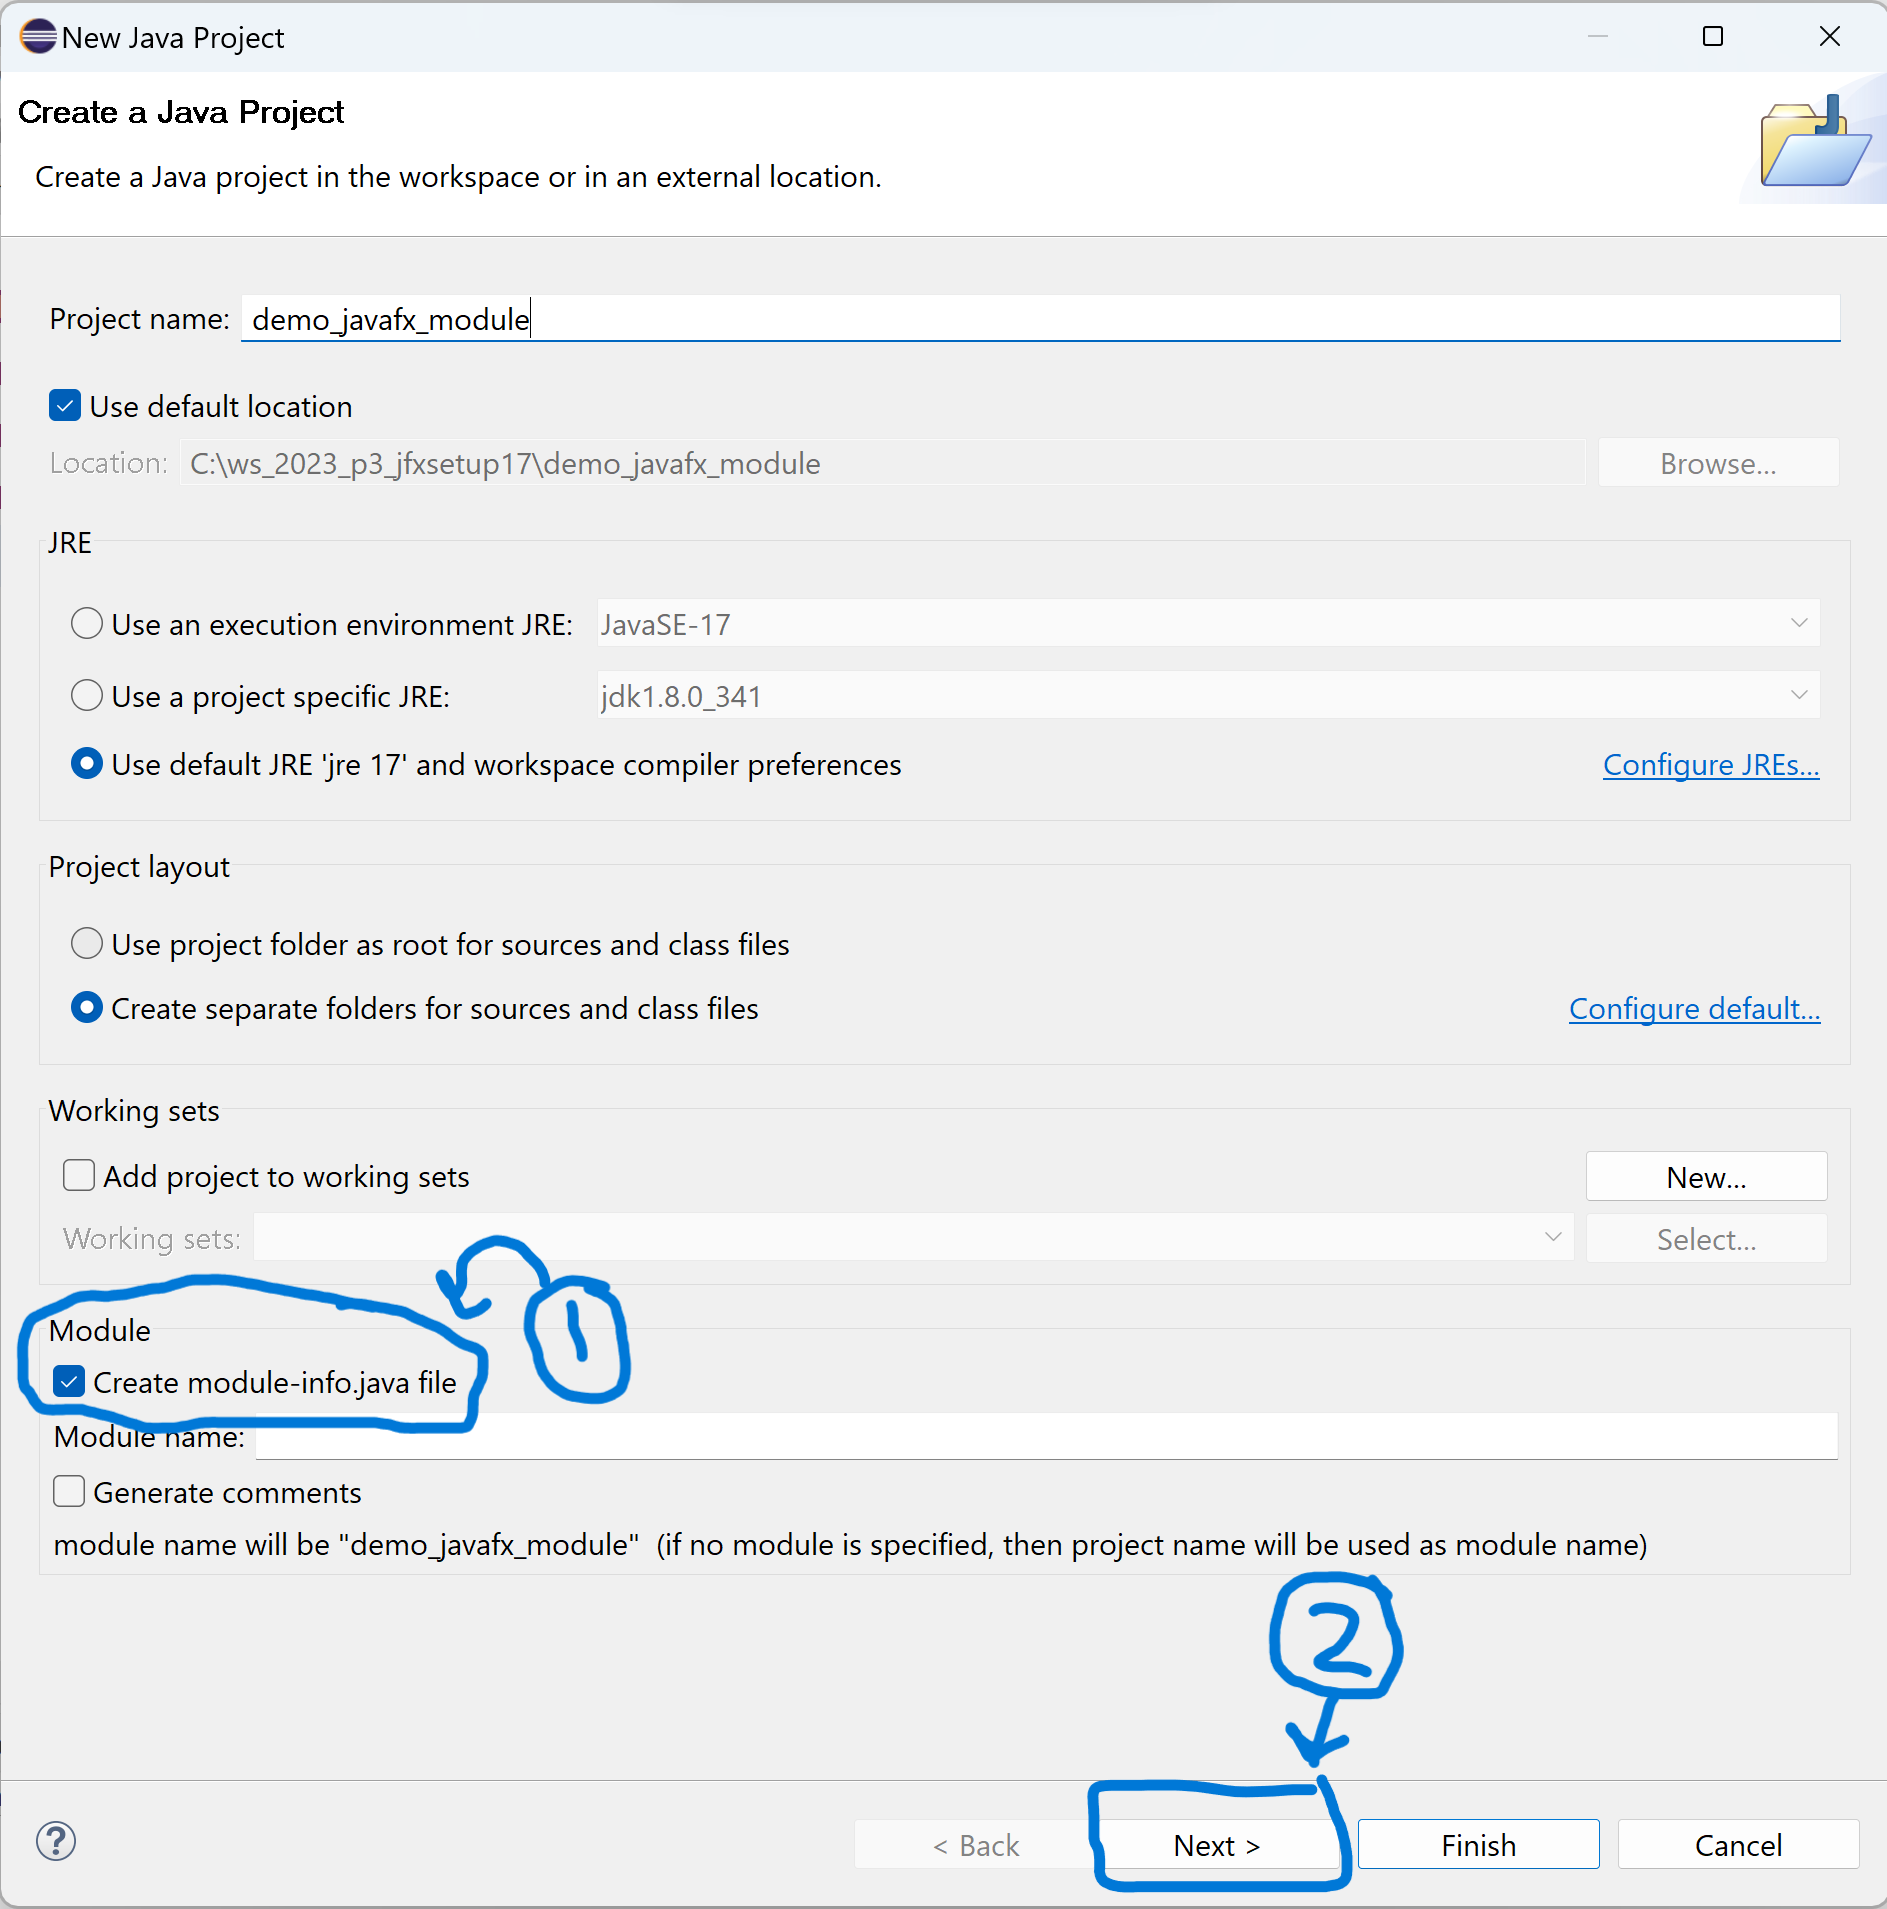
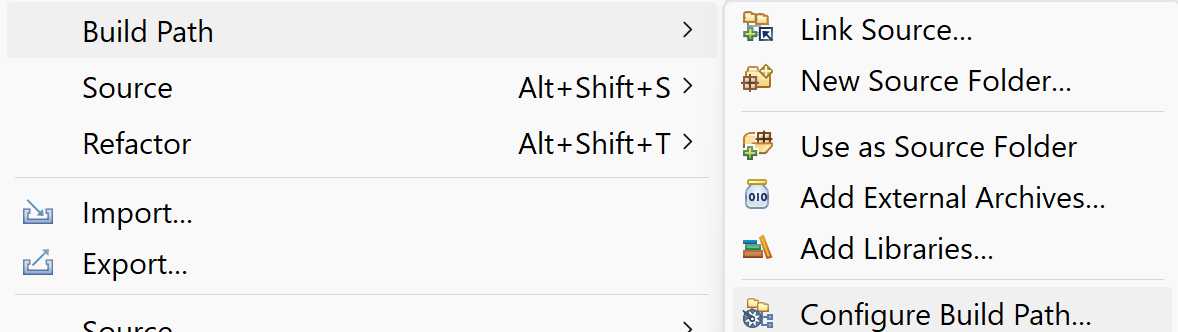
- Click the Next button to set up the build path to include JavaFX. If you accidentally hit Finish instead, just right click on your project in the package explorer and go to Build Path --> Configure Build Path.
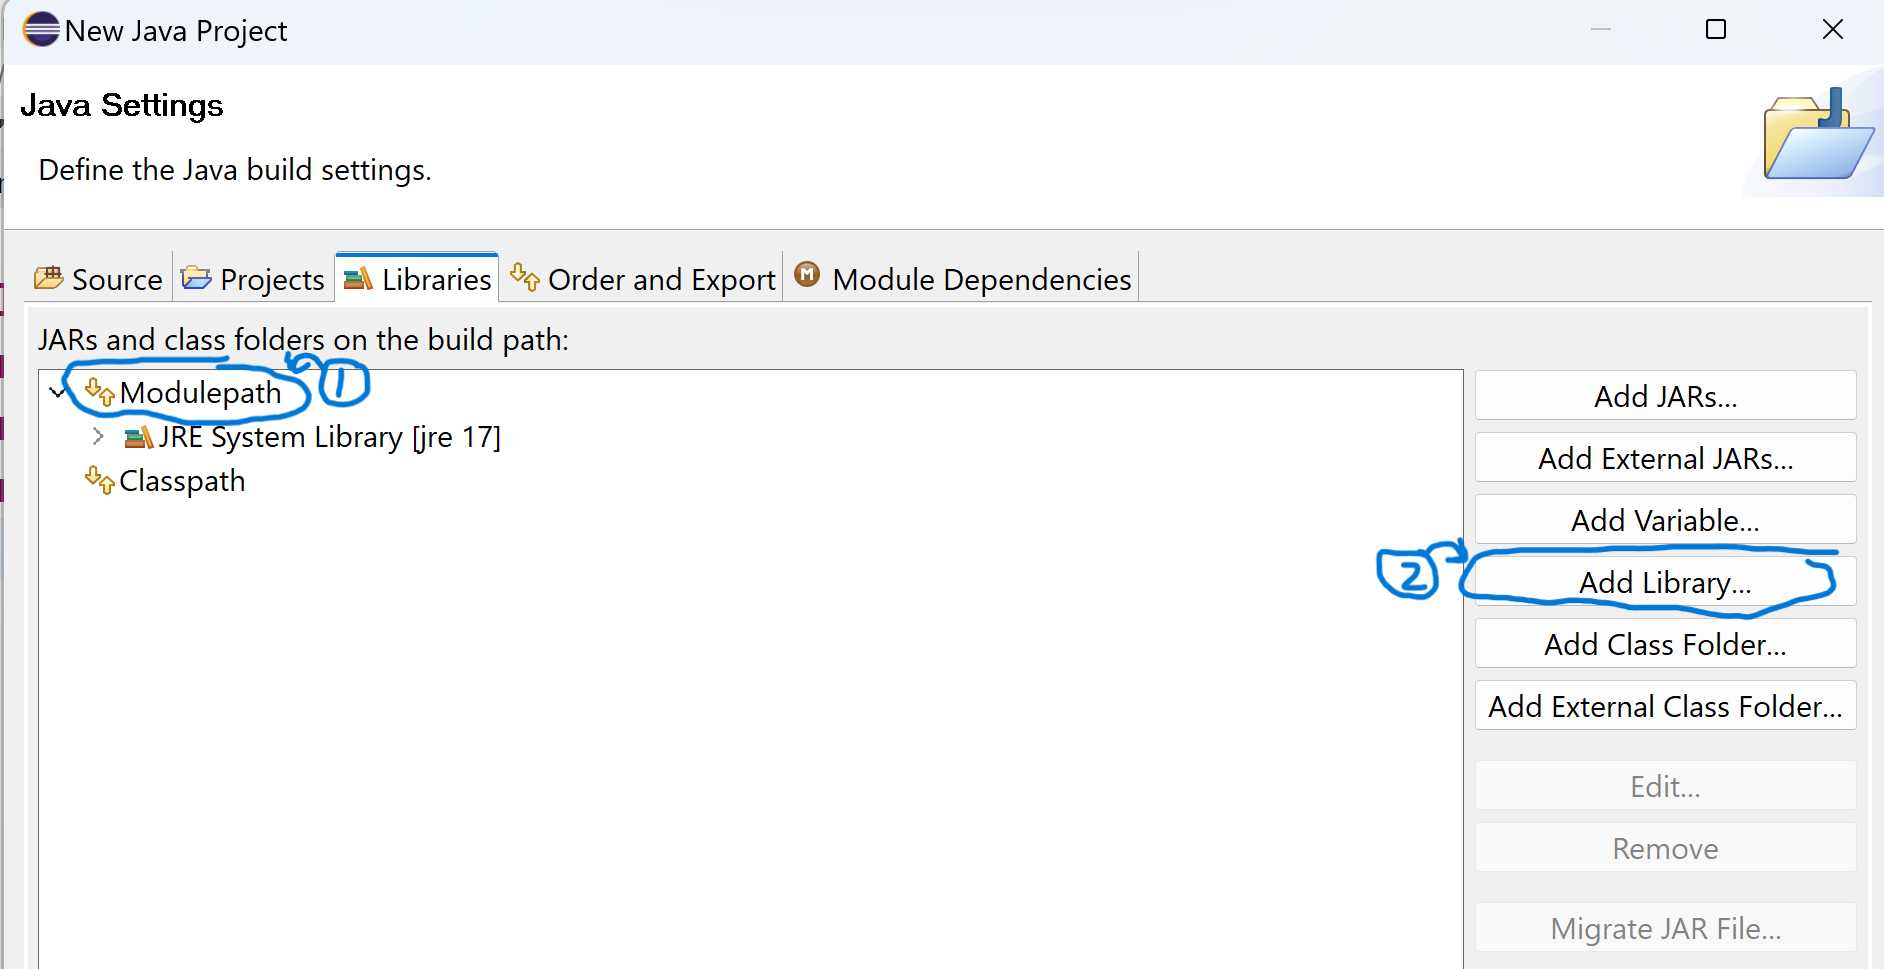
- If you pressed Next, you will need to click on the Libraries tab. In either case you should see something like the window below:
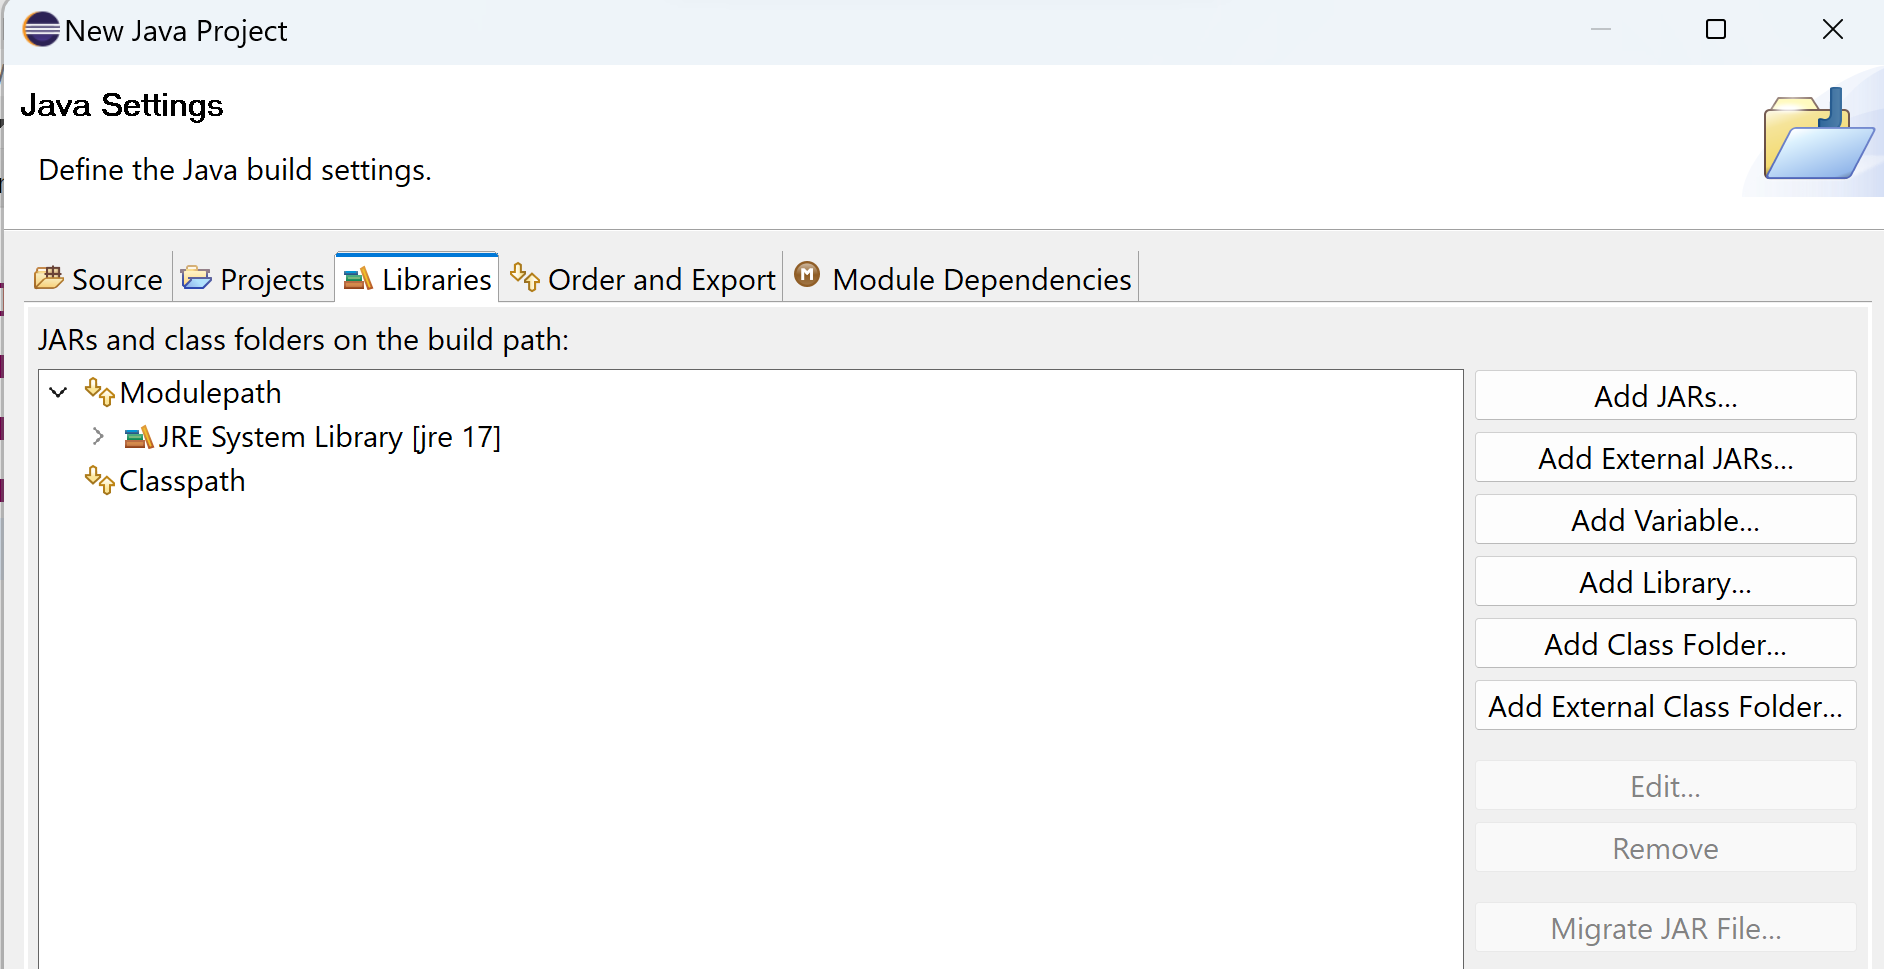
- Click on the Modulepath and then click the "Add Library..." button.
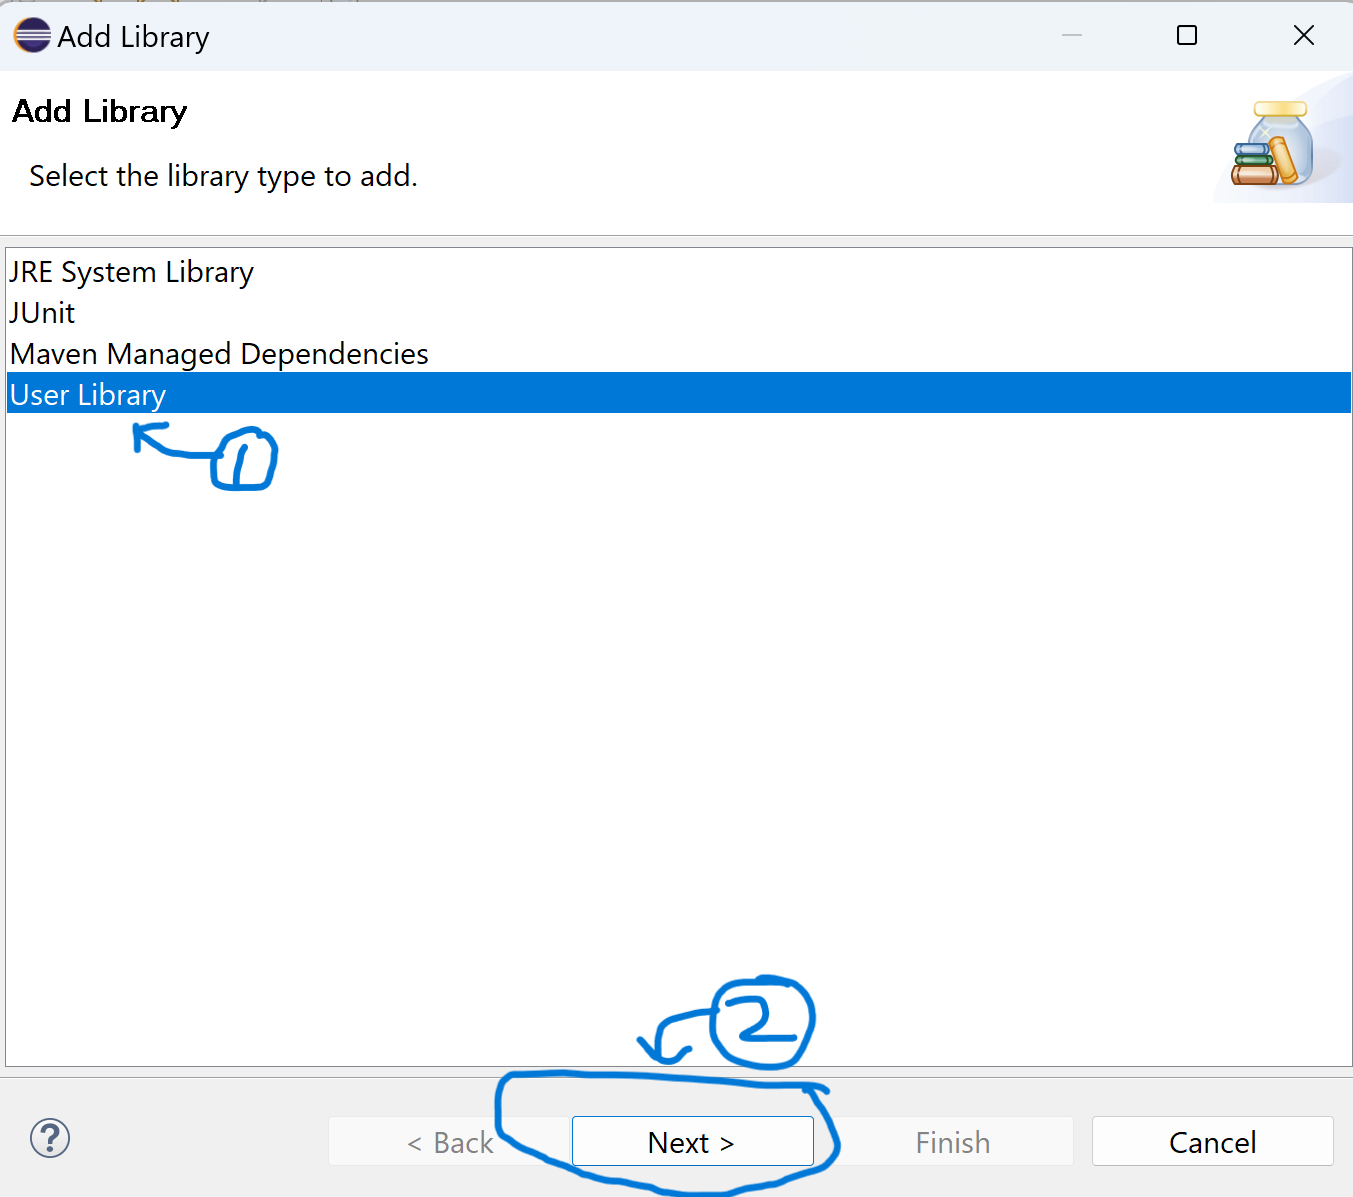
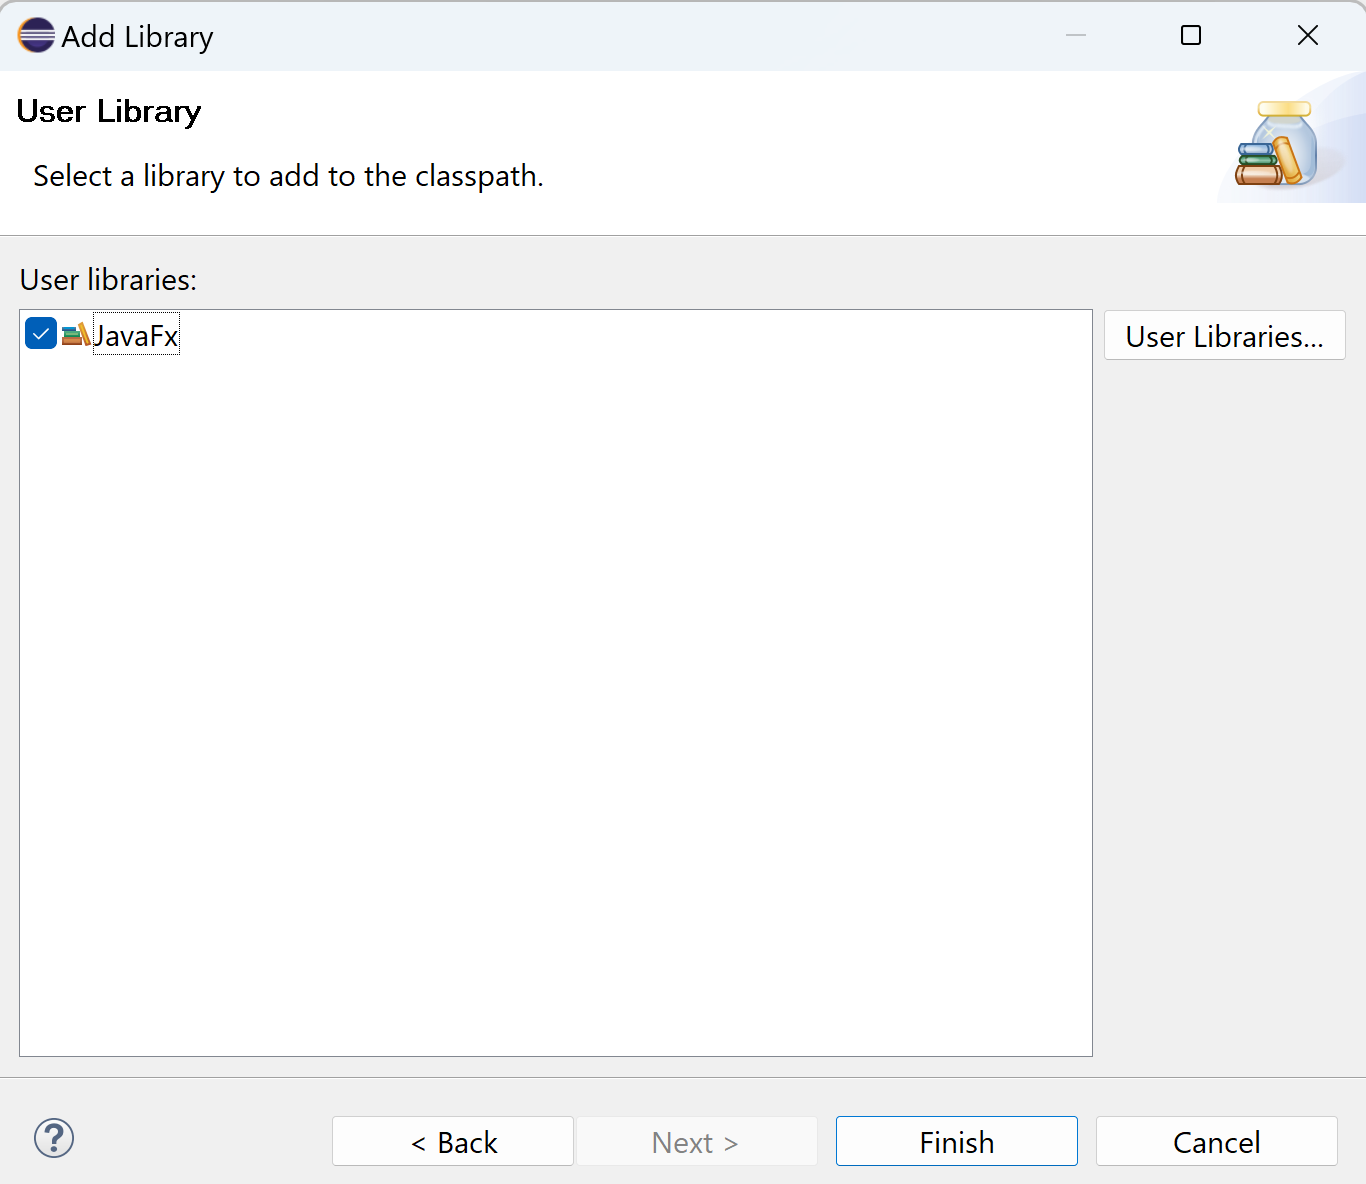
- Select the JavaFX user library you created earlier and click finish.
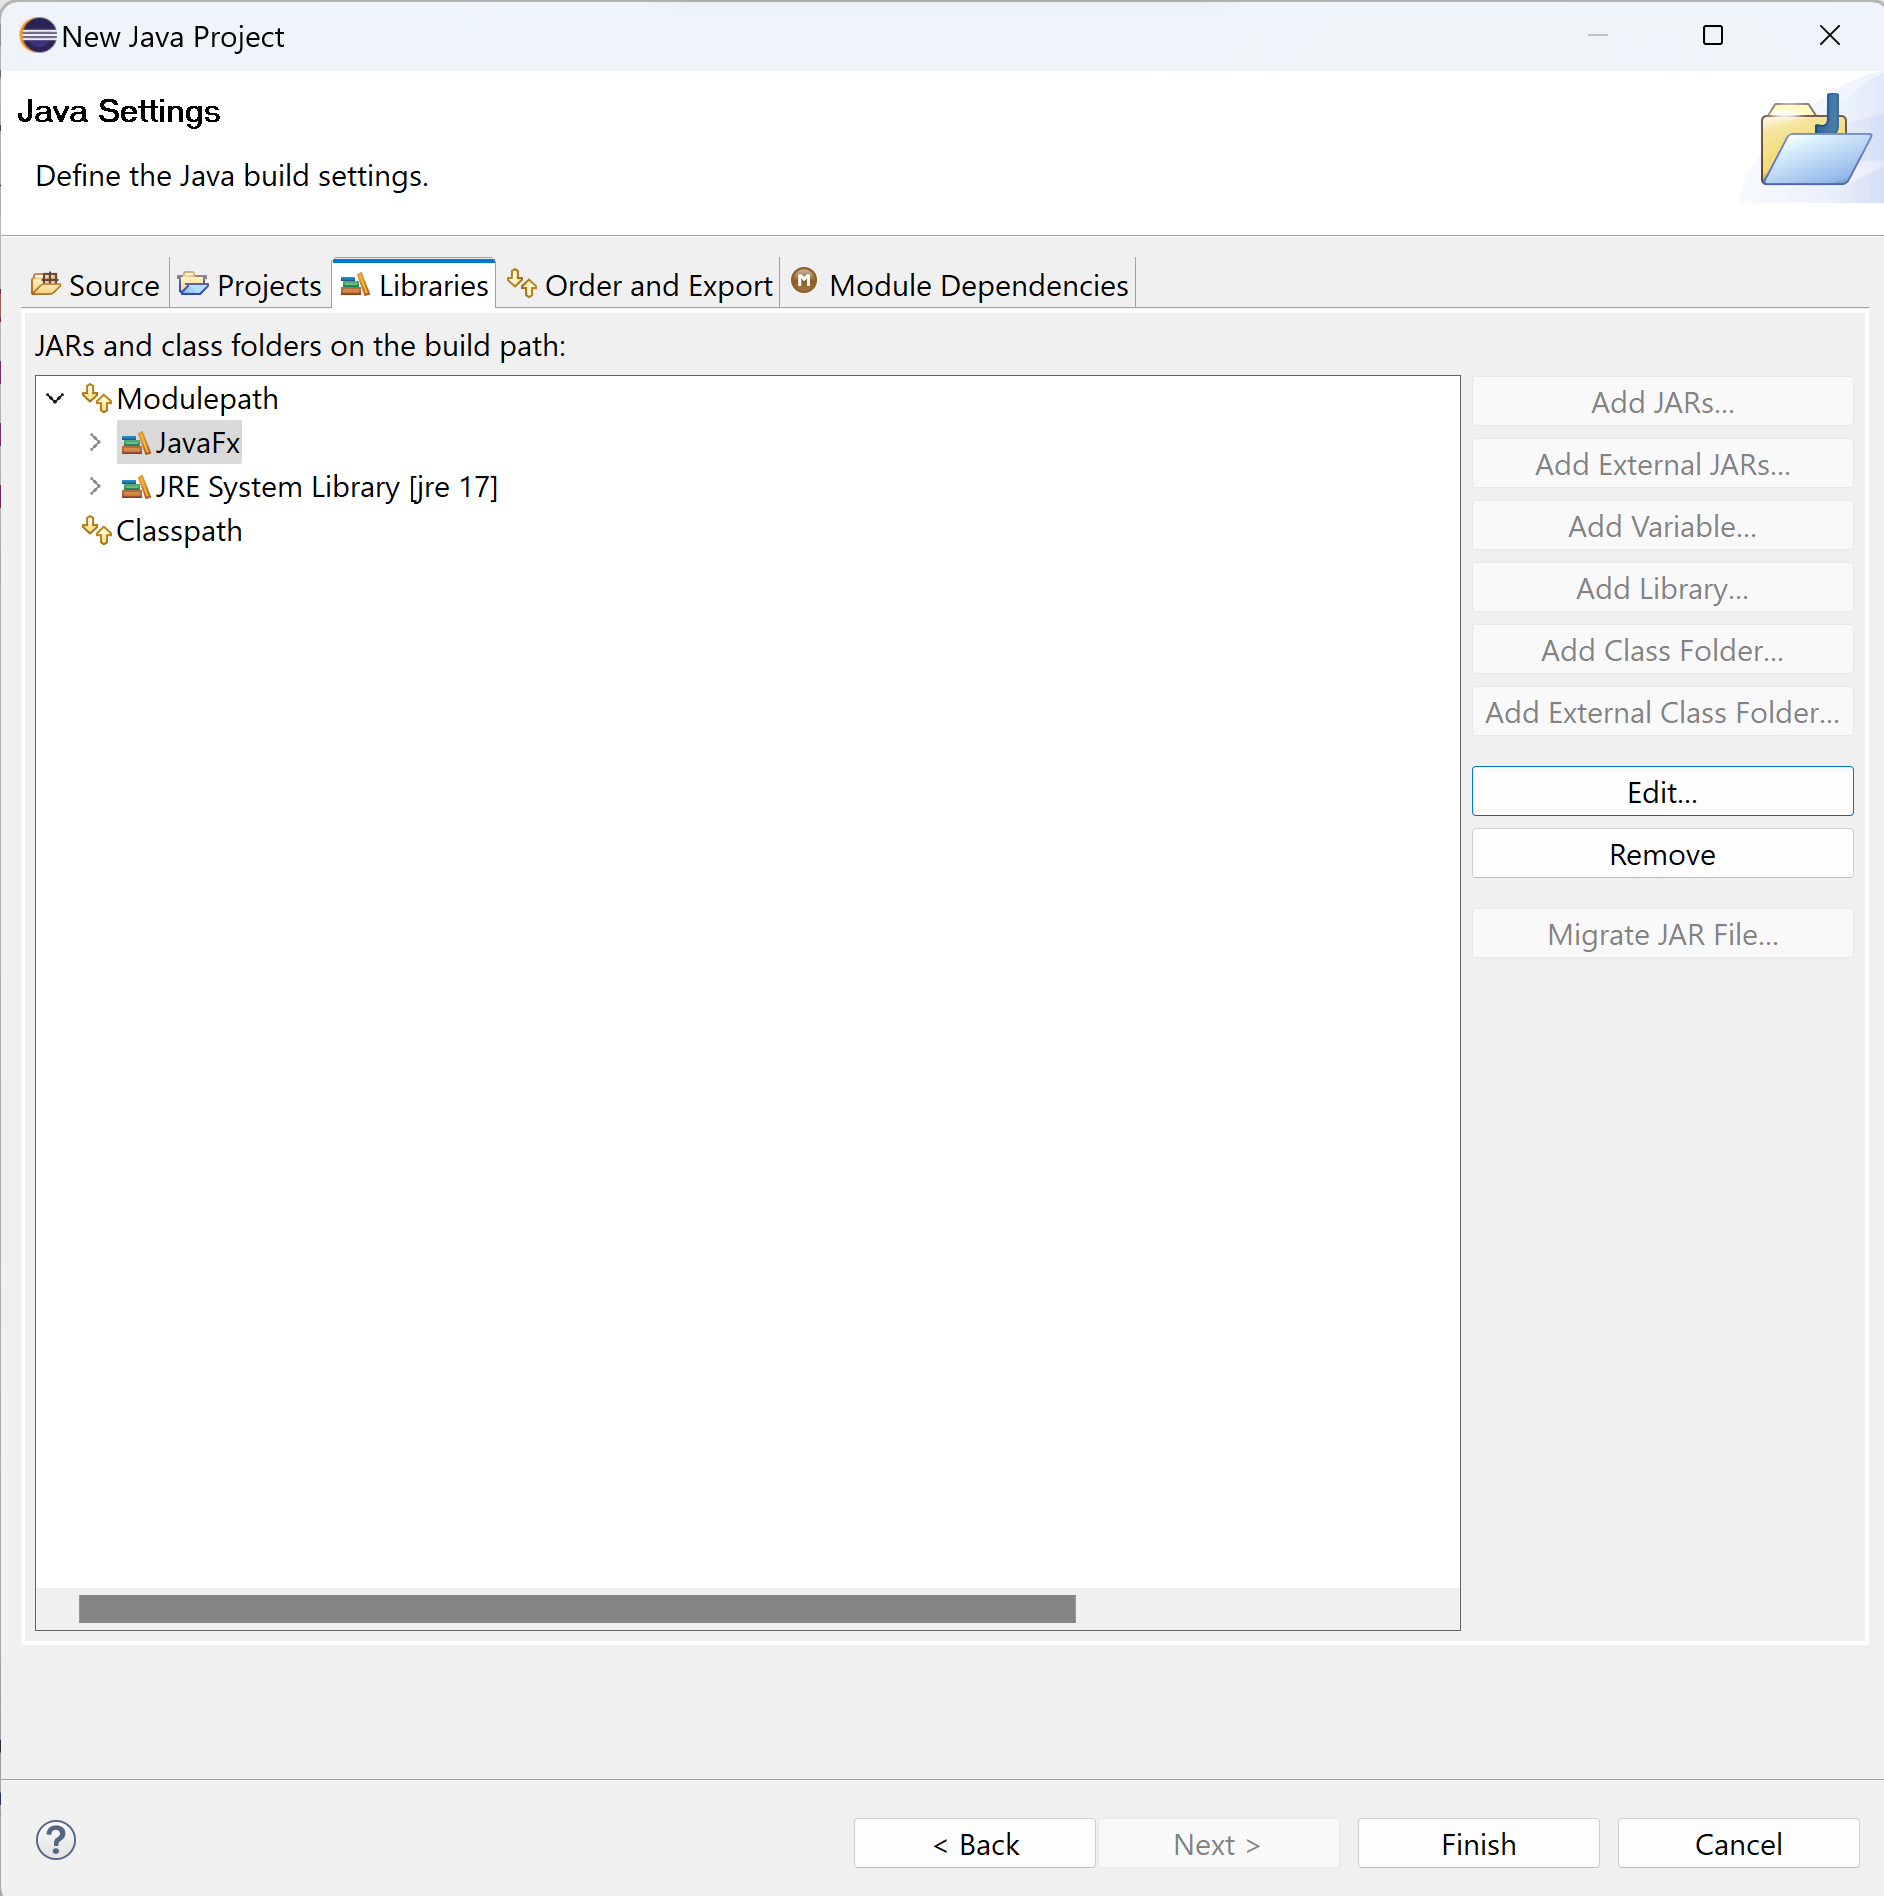
- Your Libraries tab should look like this now. Click finish to finish creating the project (or modifying it's build path).
- Your project should look like the picture below.

- Open the module-info.java file. Add the
open keyword in front of your module declaration. This makes it so other modules can access all the classes in your module. Technically, we could have been more selective, but you have to at least open the package containing the subclass of Application you will make to the javafx.graphics module so the Application class can discover the class you called launch() on (your Application subclass).
- Inside the module definition, for each of the modules you need to access in javafx, write
requires javafx.modulename. You will generally want to at least require javafx.graphics, javafx.controls and javafx.fxml, but you may also want to require javafx.media if you plan to have sound or videos in your application, and javafx.web if you plan to use a WebView. You may also find that you need to require other modules even from the java library. For example, if you use any classes from the java.awt package, you would need to require java.desktop. Here is a list of all the modules in JDK 17. When looking at the API for a class in JDK 11+, you will see the both the module and the class listed at the top. Here is the JDK 17 API for ArrayList as an example. You will see that the java.util package is in the java.base module. Packages in java.base don't need to be explicitly required (sort of like how classes in the java.lang package don't need to be explicitly imported), however you will find classes in other modules such as java.desktop do need to be explicitly required in the module-info.java file. Eclipse is pretty good about offering to both import and require modules for you as needed. You can read more about the module system here and here.
Your module-info.java should now look something like this:
// make the module open so the Application.launch() method can use reflection to
// determine which class called the launch method (detects your main class)
open module demo_javafx_module {
    // Require each of the javafx modules you need to use.
    // Include at least javafx.graphics, javafx.controls and javafx.fxml.
    requires javafx.graphics;
    requires javafx.controls;
    requires javafx.fxml;

    // You may want to require javafx.media if you use sound or videos
    requires javafx.media;

    // You may want to require javafx.web if you use a WebView
    requires javafx.web;
}
- To test your set up, you need to create driver class that extends Application. You can start by just making the class. Since your project is now a module, you are no longer allowed to have any classes in the default package, so make sure you put your class in a package as shown in the picture below.
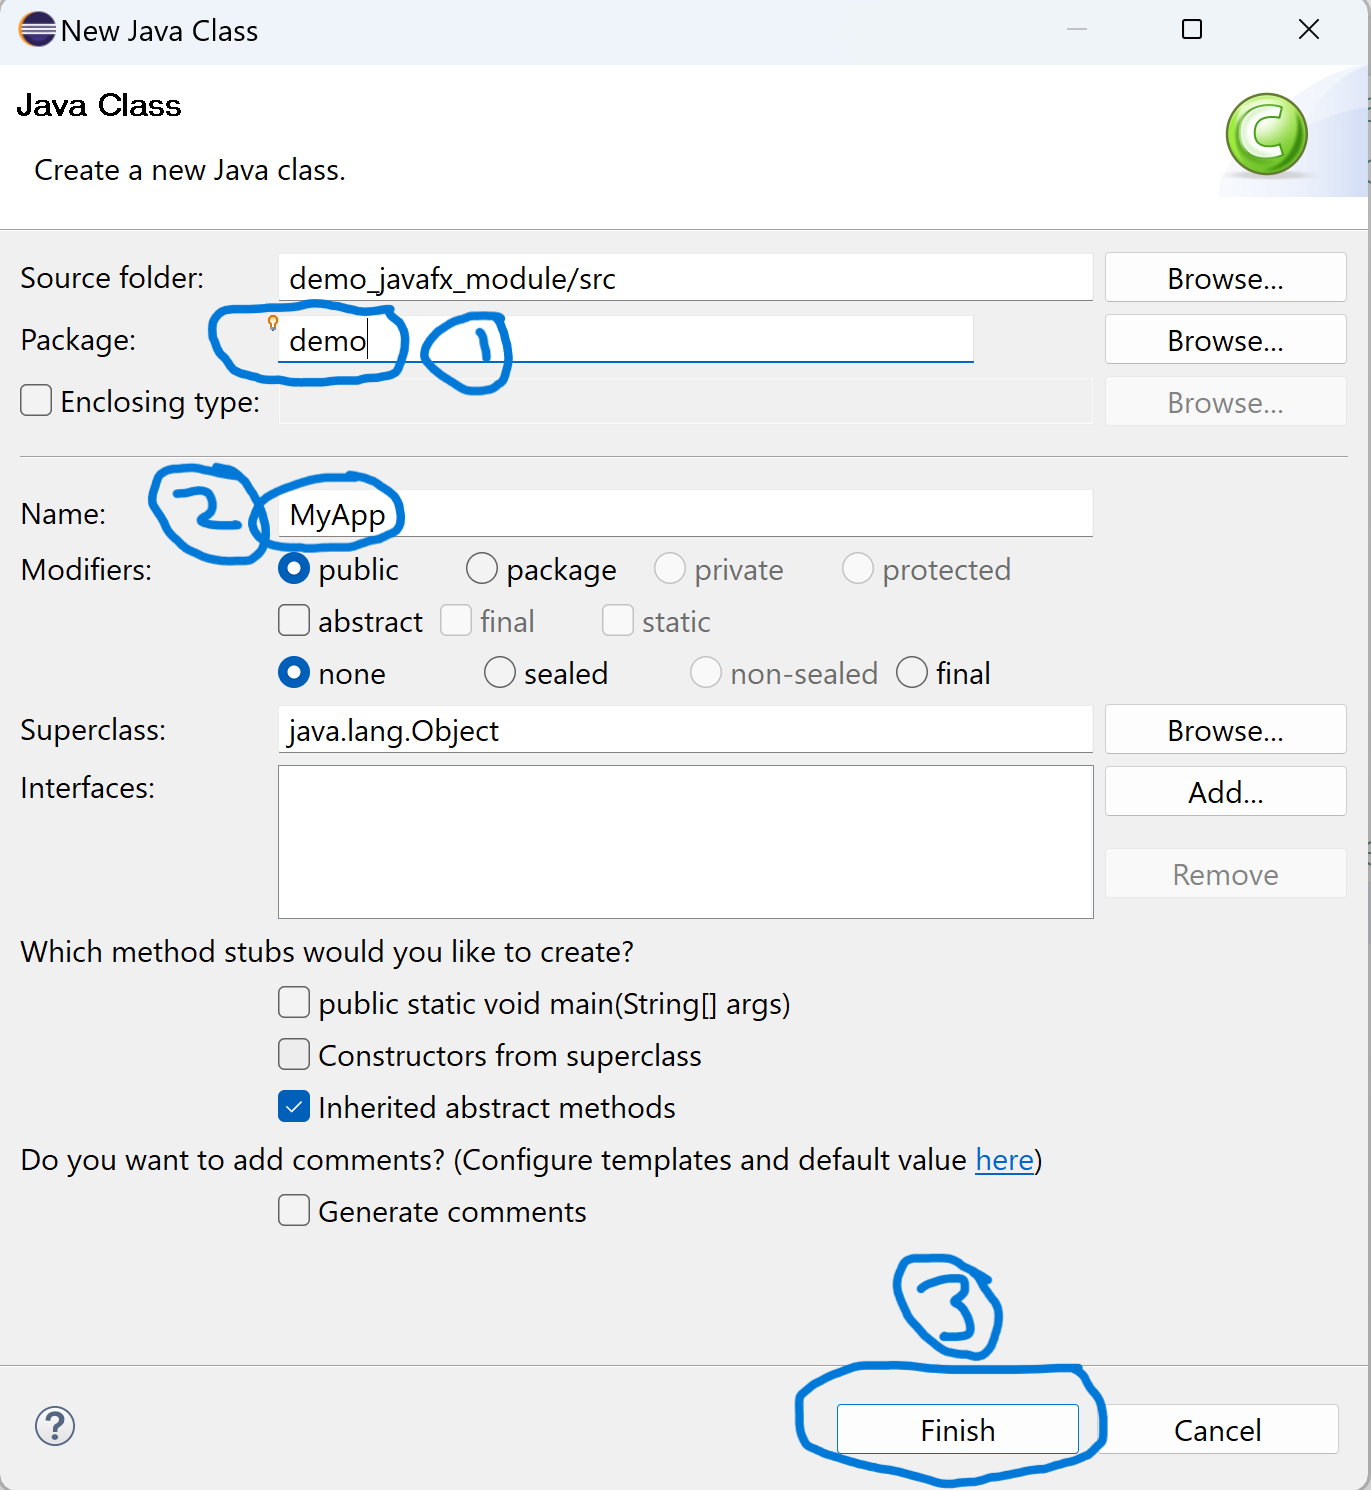
- You can paste the code below into your class to test that everything is working correctly. Note the package declaration is important since you cannot have classes in the default package.
package demo;
import javafx.application.Application;
import javafx.stage.Stage;
public class MyApp extends Application {
// You still need a main method, but it calls launch to start JavaFX
public static void main(String[] args) {
launch(args);
}
@Override
public void start(Stage stage) throws Exception {
// Entry point
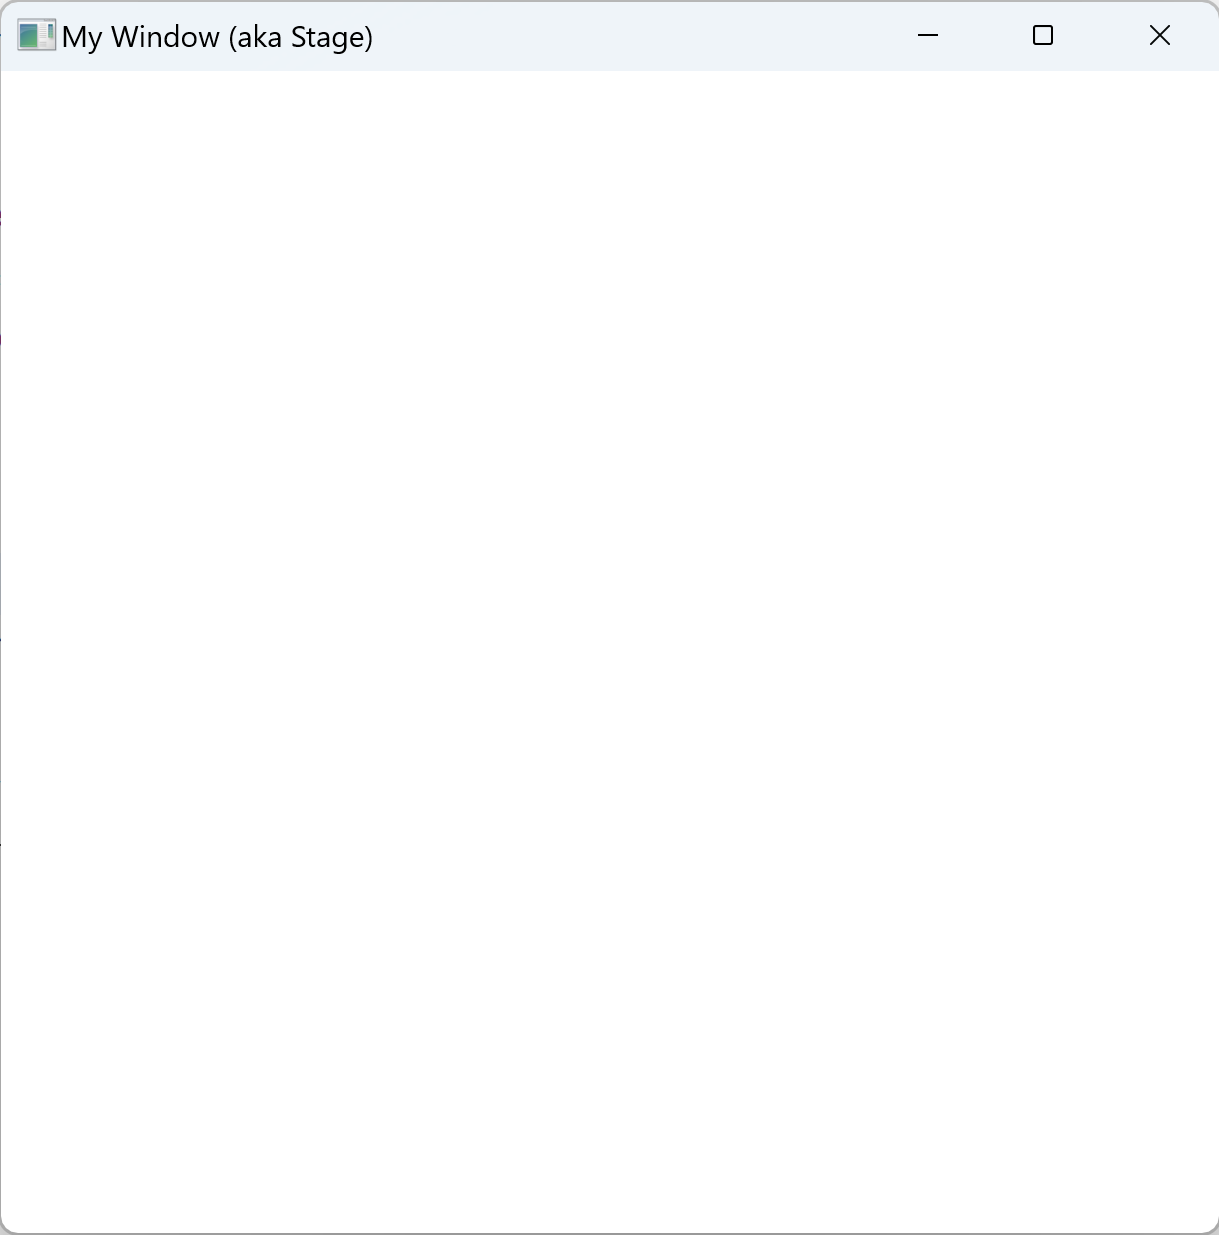
stage.setTitle("My Window (aka Stage)");
stage.setWidth(500);
stage.setHeight(500);
stage.show();
}
}
Running this code, you should see something like this:
If an error message about native access for javafx 25+ shows up in the console, right click and go to Run As -> Run Configurations... and add the following VM argument: --enable-native-access=javafx.graphics. Note that in jdk 25 the error message is just a warning, so your program should still run, but in future versions it may become an error.