JavaFX Lab 4.1 GridViewer
Overview
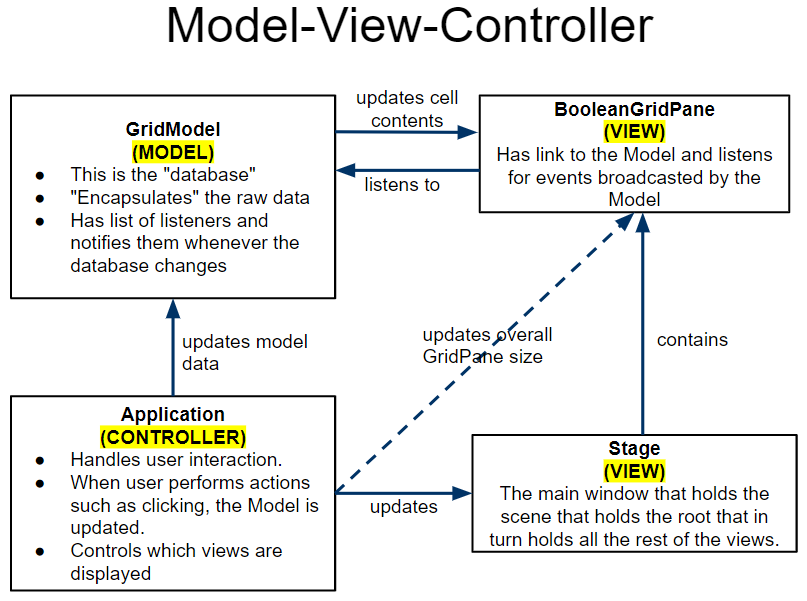
- Demo of the assignment (video)
- Model-View-Controller (video)
- Explanation of starter code (video)
Walkthrough Base Code (done during class)
- Create a new Project and enable javafx accessibilty
(You could also copy an old project and delete the files from it)
- Download the GridViewTemplate starter code and put it in your project
- You can also download the javadocs for the gridviewer starter code
- Create a JavaFX class named
PX_Last_First_GridViewer that extends Application, calls launch() in a main method, etc.
- Set up the GUI. Suggested: Use a BorderPane root node
- bottom panel with Clear button, Load button, and Slider for cell size
- If you've never used a slider before, there are lots of methods you need to call to set up the slider's look. A few important methods are: setMin / Max, setShowTickLabels / Marks, setMajor/Minor Tick.
- Add two attributes
GridModel<Boolean> model- BooleanGridPane view
- Initialize the attributes
- Instantiate the view
- Create a new 2D Boolean array and pass it to the model's constructor
You can hard-code this. It will be your program's default picture that shows up when running the program.
- Tell the view which model to use by calling setModel
*Note: If you forget this step, you won't see a grid at all!
- Add the view in middle, centered
- Add code so that clicking on the view updates the model by toggling the selected cells as shown in the demo video
- Continue from here on your own
Assignment
Your assignment is to re-create the GridViewer lab demonstrated here. (See next slide for required features)
Start by downloading the starter code.
Watch this video to see a quick overview of the classes in the starter code and to see how the program should work.
Then watch this video to see a demo where a BooleanGridPane is created that responds to mouse clicks by toggling the value at the grid pos you clicked.
Requirements
Tips
- For loading files, JavaFX has its own FileChooser class. Import and use javafx.stage.FileChooser; The only method you need is showOpenDialog(null). This method returns the File selected by the user (or null if the user presses cancel). From there, you can pass the File into a Scanner and read the data.
- Remember that you can ask the model how many rows and columns it has.
- Please follow the same file format shown in the video. Rows, columns and then a grid of 'X' and 'O' characters with spaces between.
- (Optional) When the user scrolls using a mouse wheel, increase or decrease the cell size. You can do this by calling setOnScroll() on either the root Node or the BooleanGridPane. Note that you'll need to create a private inner class to make the object required by the setOnScroll parameter.
Submission
- You do not need to submit the starter code because you should not have changed anything in those classes (
BooleanGridPane, GridListener, GridModel)
- The only file you must submit is your
PX_Last_First_GridViewer class.
You must Sign In to submit to this assignment